Getting Started with Linux Instances
- Kevin Coakley
- Ryan Nakashima
- Jenny Nguyen
Account Setup
The SDSC Cloud team sets up accounts for customers. Please contact services@sdsc.edu to acquire an SDSC Cloud account.
Login to the Dashboard
- In a web browser address bar, enter this link: https://dashboard.cloud.sdsc.edu
On the login page, enter username and password. Click "Sign In."
Note: The top of the window displays your user name in the upper right corner. You can access settings or sign out of the dashboard by clicking on your name.
Create an SSH Key
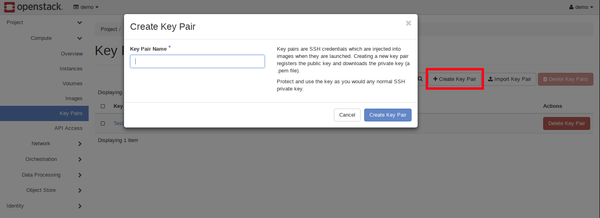
- From the Dashboard, click on Compute for the scroll down menu, then click on Key Pairs.

- From there, up at the top click on Key Pairs then click on +Create Key Pair. You will then be asked to give your Key Pair a name. Once you have done so, click on Create Key Pair.
- Once it's created, you will be redirected to a page that should automatically download Key Pair as a .pem file.
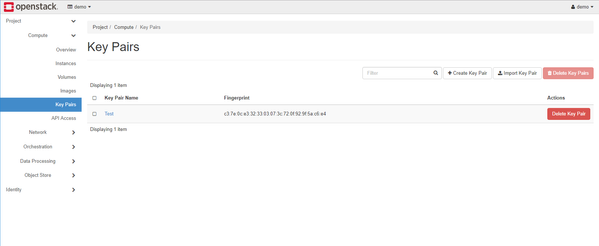
3. Your Key Pair should then appear on the list of Key Pairs you have created.
Configure the Firewall for SSH Access
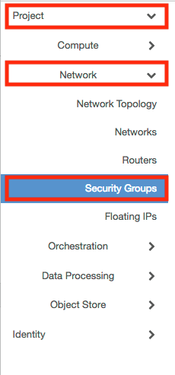
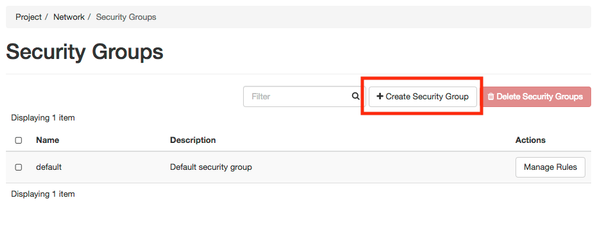
- On left nav, select Project, Network then Security Groups.
- Select the Create Security Group button.
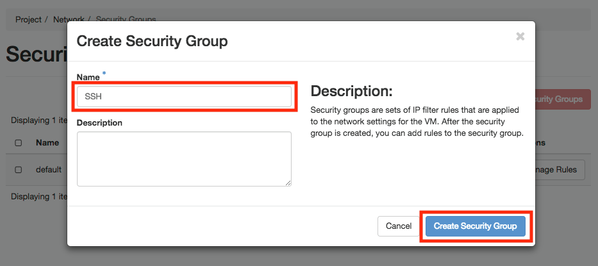
- In the popup box, enter "SSH" as the Name and click the Create Security Group button.
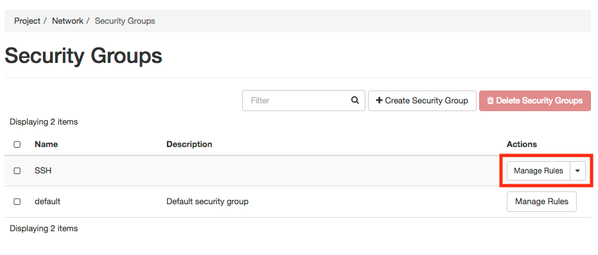
- Select the Mange Rules button for the SSH security group.
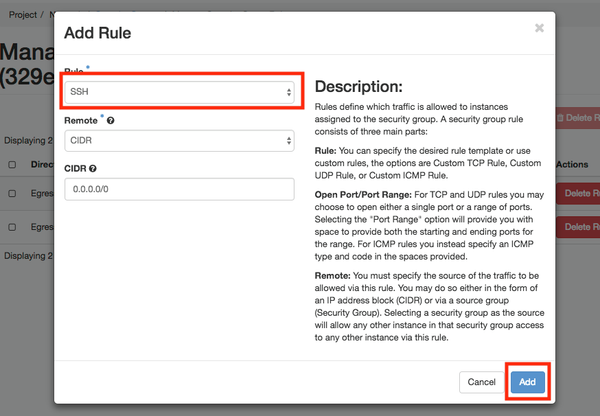
- Select the Add Rule button.
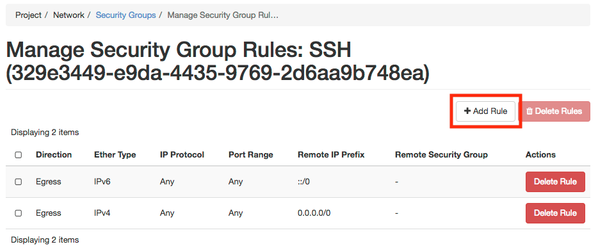
- Select SSH from the Rule drop down list then select the Add button.
Launch an Instance
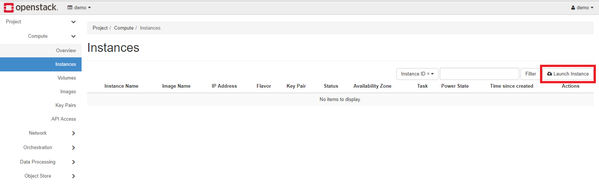
- To launch an instance, click on Compute then click on Instances. Up at the top, select Launch Instance.
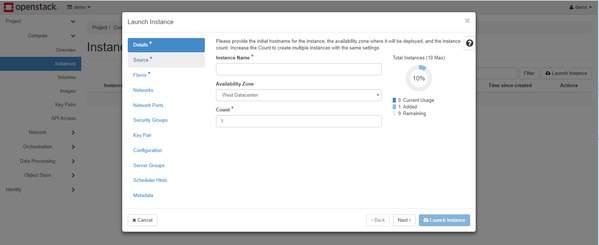
2. You will then be prompted through steps (click next after each one or click any categories on left to jump to that part):
Details:
- Enter the name of your instance in the Instance Name text box.
- Select West Datacenter from the
- Enter the number of instances you would like to create in the Count text box.
Source:
- Select Image from the Select Boot Source drop down list.
- Create New Volume toggle:
- Yes will create a volume that can persist after deleting the instance. You will have to select a size for this volume.
- No (recommended) will create image size disk that will be deleted when you delete the instance. (You can attach additional volumes for additional persistent disk space.
- If you selected Create New Volume above, then use the Volume Size (GB) text box to enter the size in GB of the root disk volume.
- If you selected Create New Volume above, then use the Delete Volume on Instance Delete toggle to select Yes and delete the root disk volume when the instance is deleted or select No and keep the root disk volume when the instance is deleted.
- Select a boot images from the list at the bottom of the window. Click the up arrow to select an image.
(For more information on which Image to select, please see Public Cloud Images. For most uses we recommend either Centos 8 Stream or Ubuntu 18.04 LTS or later.)

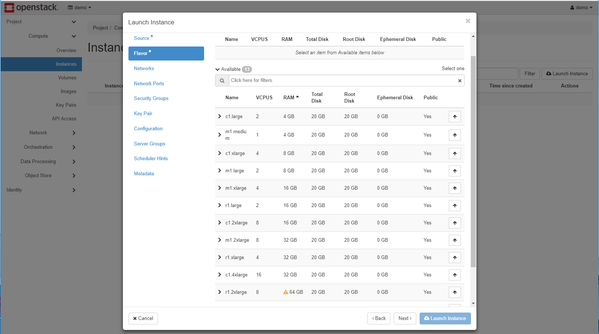
Flavor:
- Select a Flavor from the list. Click the up arrow to select a flavor.
(For more information on which flavor size to select, please see: Instance Types and Costs)
Networks: Choose the network that includes your project name, i.e. the network not named "ext-net"
Network Ports: No changes should be needed
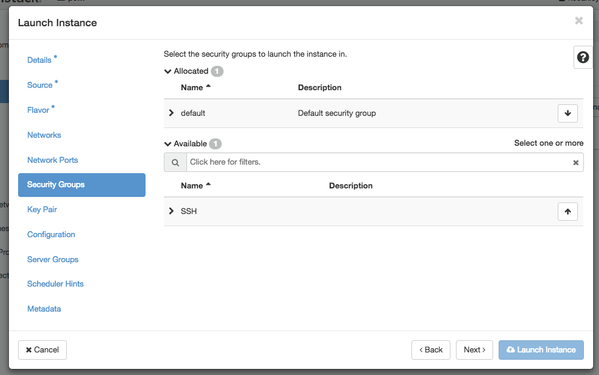
Security Groups:
- Select the up arrow for SSH to add the SSH security group to your instance.
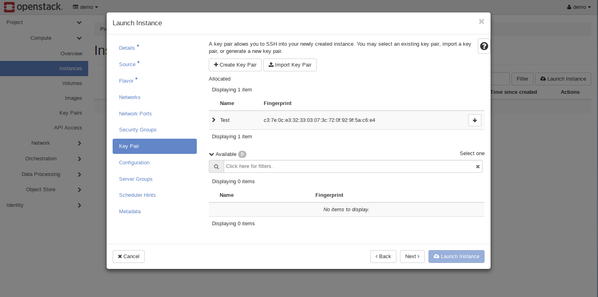
Key Pair:
- Use the up arrow to select your SSH key pair from the list at the bottom.
Select the Launch Instance from the bottom right corner to start the instance.
Assign a Public IP Address
- To assign a public IP address, under Compute then Instances, select the drop down menu next to Create Snapshot of the
Instance you want to assign the IP address to. In the drop down menu select Associate Floating IP.
- A window will come up. Select the plus box next to Select an IP Address.

3. Another window will come up and from there select Allocate IP.
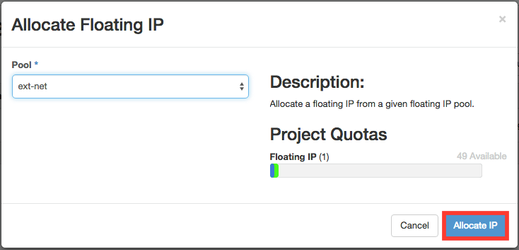
4. An IP Address will then be allocated, and should appear in the IP Address box. Select Associate to finish.
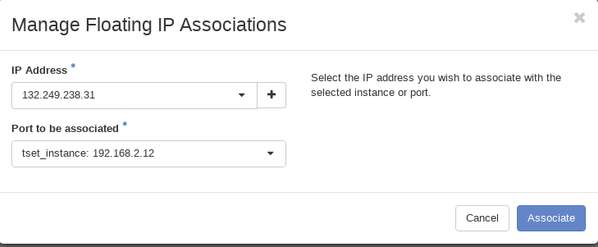
- If a Floating IP address already existed, you may select it initially and click Associate.
SSH to the Instance
Delete the Instance
- To delete an instance, under Compute then Instances, check the box next to the Instance you want to delete.
At the top, select Delete Instances.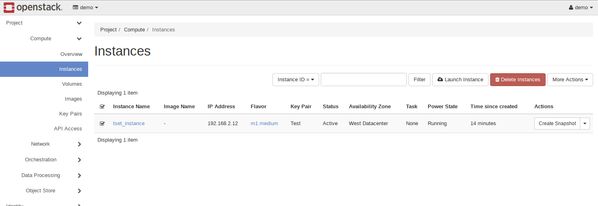
Have Questions?
SDSC Cloud FAQs
Email SDSC Support
Email support@sdsc.edu for assistance from SDSC Cloud engineers.