Creating and Launching Instances from Snapshots
This guide will help you create a snapshot from an existing instance and launch an instance from that snapshot. For help creating an instance, follow the Linux or Windows instructions on this wiki.
Table of Contents
Create Snapshot
- From the dashboard, find the menu on the left. Expand Project then expand Compute. Then click Instances.
- In the Instances section, locate the instance you would like to create a snapshot of and click the Create Snapshot button at the end of the row.
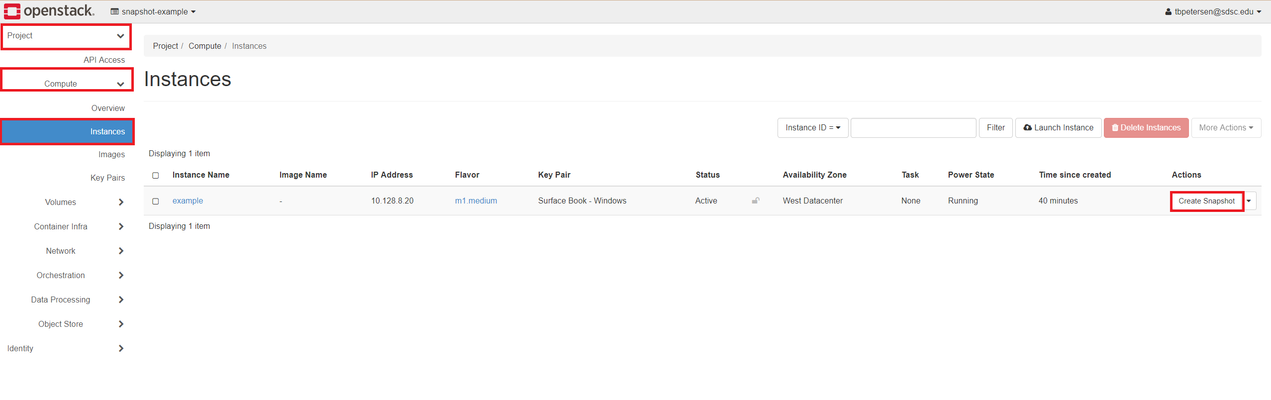
- In the popup window, enter a name and click Create Snapshot. Your snapshot will appear along with public images in Project → Compute → Images.
Launching an Instance from a Snapshot
- From the dashboard, find the menu on the left. Expand Project then expand Compute. Then click Images.
- In the Images section, locate the snapshot you would like to launch an instance from and click the Launch button at the end of the row.
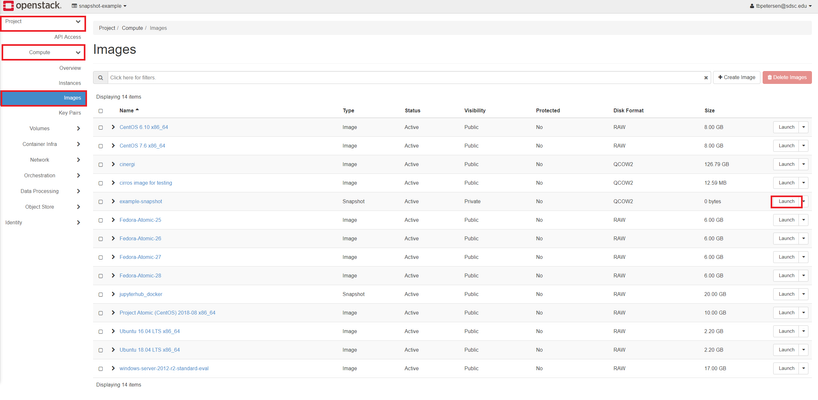
- In the popup window, finish configuring the instance that will be launched. At minimum, you will need to provide an instance name and flavor. When you are done, click Launch Instance in the bottom right to launch it. Your instance will appear in Project → Compute → Instances.
Note: When launching an instance from a snapshot, the launched instance will have copies of all volumes that the snapshotted instance had. For example, suppose you have an instance named "Instance A" which has volumes 1a and 2a attached to it. If you snapshot Instance A and then launch a new instance, "Instance B," then Instance B will have copies of volumes 1a and 2a attached to it.
, multiple selections available,