| Table of Contents |
|---|
Overview
A VNC (Virtual Network Computing) is a graphical desktop sharing system that can remotely control another computer.
On your local computer, please install a supported VNC Client:
On macOS, you can use the built-in Screen Sharing program, or can use a cross-platform app like RealVNC.
On Linux, you can choose from many options, including
vinagre,krdc, RealVNC, or TightVNC.
Using Windows
If you don’t already have PuTTY installed, please follow the link SSH to Instance using Windows.
Also, download a supported VNC Client, if you haven’t already. In this example, we will use TightVNC.
Connect to your server through PuTTY and open the terminal window.
On your server, update your list of packages.
Code Block sudo apt update
Now, install the Xfce desktop environment and TightVNC server
Code Block sudo apt install xfce4 xfce4-goodies sudo apt install tightvncserver
To complete the VNC server configuration, create the initial configuration file and set up a secure password.
Code Block vncserver
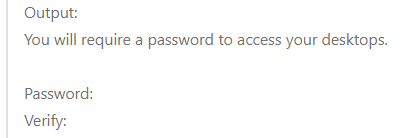
Passwords must be between 6-8 characters. If your password has more than 8 characters, it will be automatically truncated.
After setting your password, the following should appear withyour_hostname=your_instancename: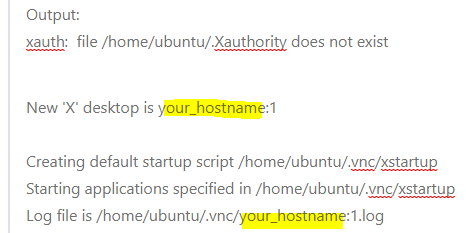
Note: if you want to change your password or add a view-only password, you can do so with the following command:
Code Block vncpasswd
Now we configure the VNC server, by first stopping the default VNC server instance.
Code Block vncserver -kill :1
Backup and modify the startup file.
Code Block mv ~/.vnc/xstartup ~/.vnc/xstartup.bak nano ~/.vnc/xstartup
This will create a new
xstartupfile and open it in the text editornano. Add the following lines:Code Block #!/bin/bash xrdb $HOME/.Xresources startxfce4 &
To save and exit, press
CTRL+X,Y, thenENTERWe make the startup file executable and restart VNC server.
Code Block sudo chmod +x ~/.vnc/xstartup vncserver
Now we connect to the VNC Desktop.
Right-click on the top bar of the terminal window, then select Change Settings.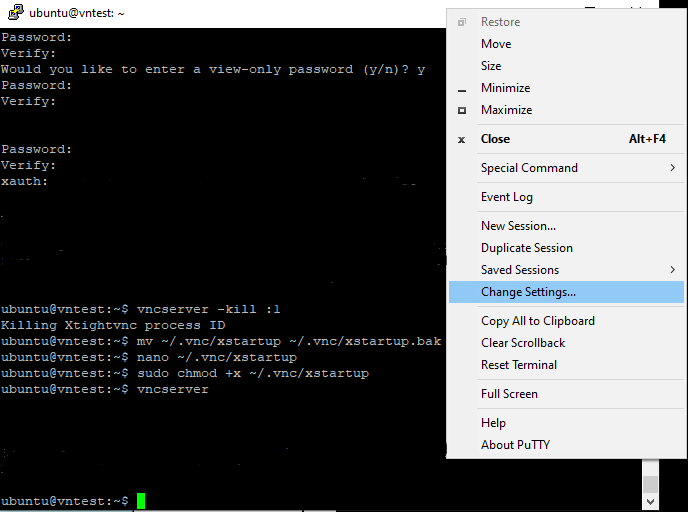
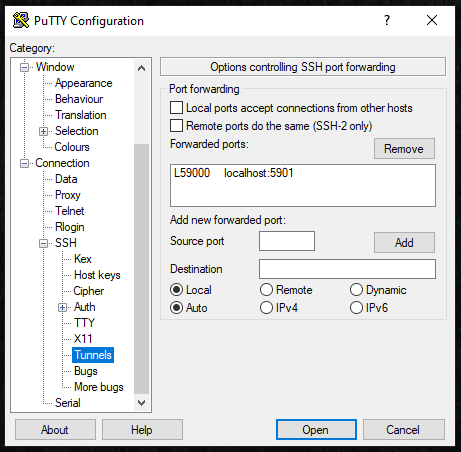
On the directory on the left-hand side of PuTTY, expand SSH and click on Tunnels.
In Source Port enter:59000
In Destination enter:localhost:5901
Click Add, then Apply.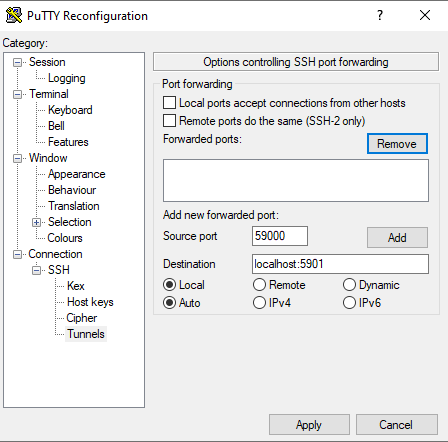
Open your VNC viewer client and connect to
localhost:59000. You should see something like the following: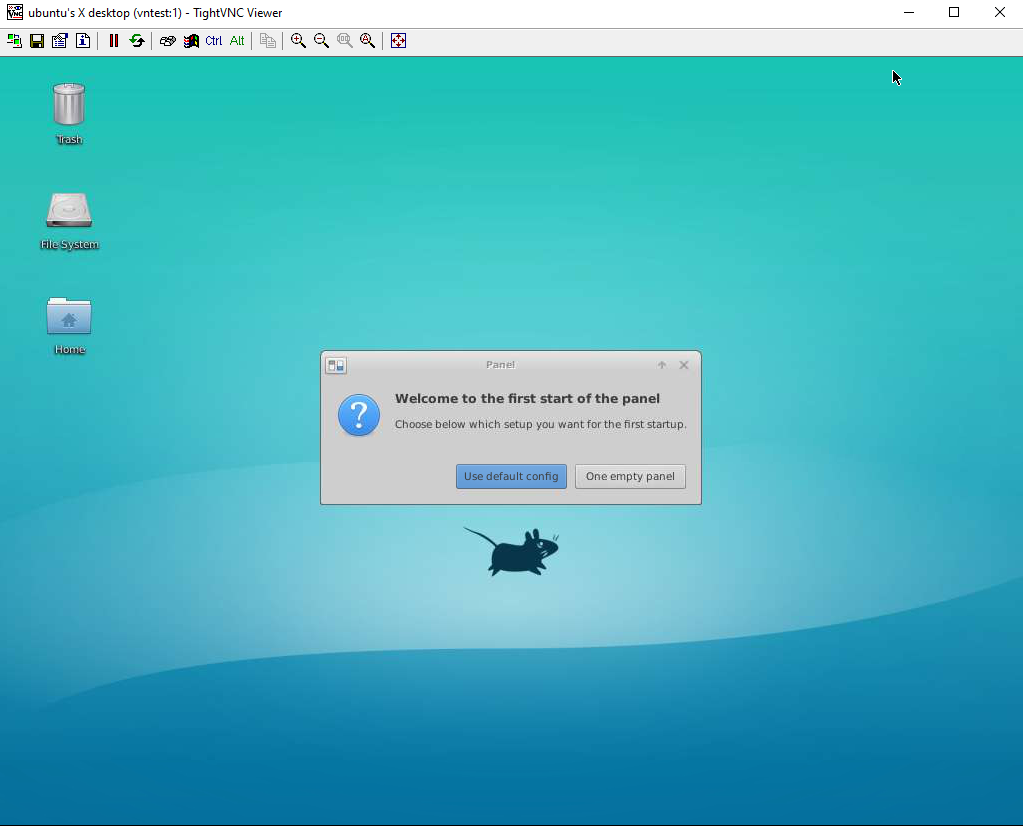
| Info |
|---|
The VNC service needs to be manually started after every instance reboot (Steps 5-10) or the service can be automatically started after instance reboot with the following optional setup: Setup VNC as System Service |
Using Mac or Linux
If you haven’t already, please download a supported VNC Client. In this example, we will use TightVNC.
Connect to your server and open the terminal window.
Instructions on how to connect to your server through SSH can be found here:
SSH to Instance using Mac and LinuxOn your server, update your list of packages.
Code Block sudo apt update
Now, install the Xfce desktop environment and TightVNC server
Code Block sudo apt install xfce4 xfce4-goodies sudo apt install tightvncserver
To complete the VNC server configuration, create the initial configuration file and set up a secure password.
Code Block vncserver
Passwords must be between 6-8 characters. If your password has more than 8 characters, it will be automatically truncated.
After setting your password, the following should appear withyour_hostname=your_instancename:Note: if you want to change your password or add a view-only password, you can do so with the following command:
Code Block vncpasswd
Now we configure the VNC server, by first stopping the default VNC server instance.
Code Block vncserver -kill :1
Backup and modify the startup file.
Code Block mv ~/.vnc/xstartup ~/.vnc/xstartup.bak nano ~/.vnc/xstartup
This will create a new
xstartupfile and open it in the text editornano. Add the following lines:Code Block #!/bin/bash xrdb $HOME/.Xresources startxfce4 &
To save and exit, press
CTRL+X,Y, thenENTERWe make the startup file executable and restart VNC server.
Code Block sudo chmod +x ~/.vnc/xstartup vncserver
Now we connect to the VNC Desktop, by creating an SSH connection.
In the terminal, input the following:Code Block ssh -L 59000:127.0.0.1:5901 -C -N -l ubuntu your_server_ip
Replace
ubuntuandyour_server_ipwith the sudo non-root username and server IP address.
Note: it may be needed to replace127.0.0.1withlocalhost, depending on the Ubuntu version.Open your VNC client and connect to
localhost:59000.
| Info |
|---|
The VNC service needs to be manually started after every instance reboot (Steps 5-9) or the service can be automatically started after instance reboot with the following optional setup: Setup VNC as System Service |
Setup VNC as System Service
The following steps will configure the VNC server to start every time the server boots up.
Create new unit file
Code Block sudo nano /etc/systemd/system/vncserver@.service
Add the following lines and replace the
ubuntuvalue in User, Group, Working Directory and PIDFILE username as appropriate:Code Block [Unit] Description=Start TightVNC server at startup After=syslog.target network.target [Service] Type=forking User=ubuntu Group=ubuntu WorkingDirectory=/home/ubuntu PIDFile=/home/ubuntu/.vnc/%H:%i.pid ExecStartPre=-/usr/bin/vncserver -kill :%i > /dev/null 2>&1 ExecStart=/usr/bin/vncserver -depth 24 -geometry 1280x800 -localhost :%i ExecStop=/usr/bin/vncserver -kill :%i [Install] WantedBy=multi-user.target
Save and close the file.
Enable the new unit file.
Code Block sudo systemctl daemon-reload sudo systemctl enable vncserver@1.service
Turn off current VNC server instance.
Code Block vncserver -kill :1
Start systemd service.
Code Block sudo systemctl start vncserver@1
You can use the following command to verify that it started.
Code Block sudo systemctl status vncserver@1
The output should say
active (running)To reconnect to the server, start your SSH tunnel (Step 8 in either of instructions above).
| Info |
|---|
With this setup, users only need to create the SSH tunnel after every reboot to connect to the VNC server, starting Steps 8 in Using Windows/ Using Max or Linux instructions, to access the VNC server. |
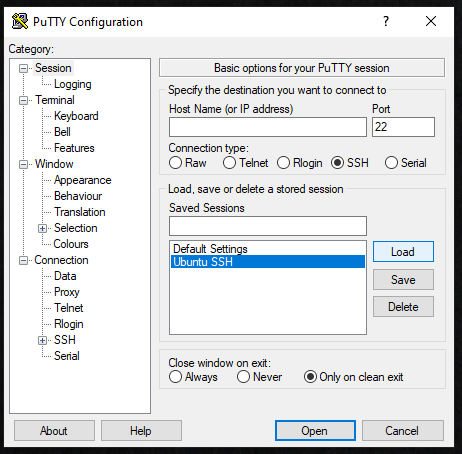
Setup SSH Tunnel Information in PuTTY
Open a new PuTTY sesssion and enter in the Host Name information, but do not click
Openyet.Under
Saved Sessions, label what you want the server and SSH information to be known as. Then clickSave.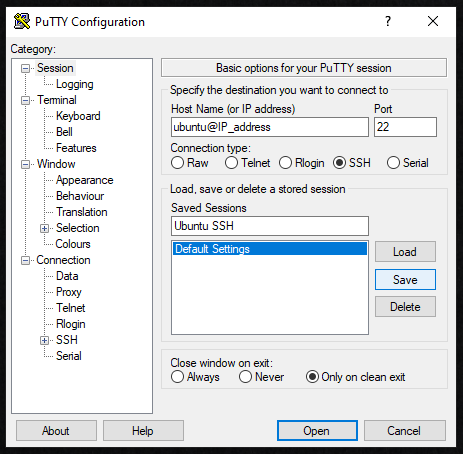
On the directory on the left-hand side of PuTTY, expand
SSHand click onTunnels.
In Source Port enter:59000
In Destination enter:localhost:5901
Click Add.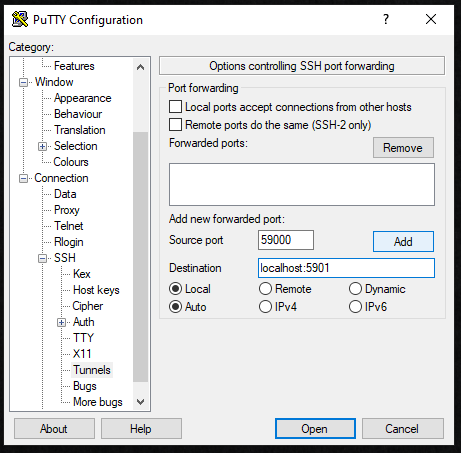
Return back to the default main page, by clicking on
Sessionin the directory.
ClickSaveonce again.The next time you reboot the instance and reopen PuTTY, load the saved session. If you click on
SSH→Tunnels, you should find the added SSH port forwarding. Then clickOpen.